Importing and Setting up a Dismember-able Character
How to create gib objects for Dismemberment System

1: Select your skinned final mesh.
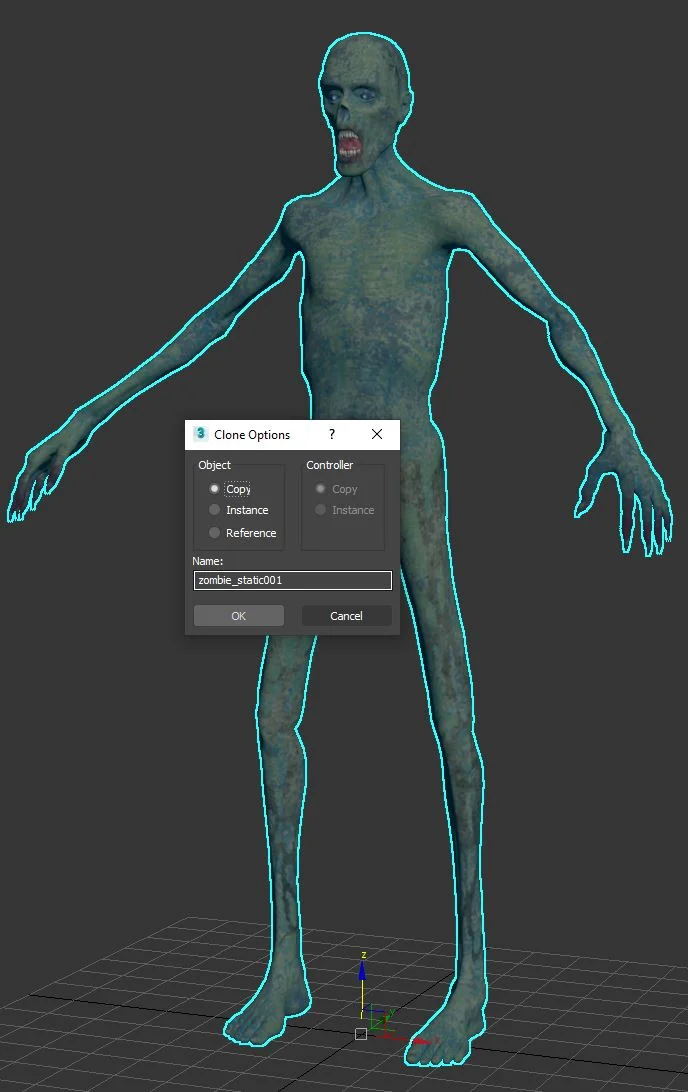
2: Copy your mesh as a new object.

3: Collapse the skinning back into editable poly. Gibs/dismembered pieces are always static meshes.

4: enter the editable poly and detach objects that you want to scatter when the head explodes, such as teeth and eyes.

5: Change the pivot of each object by using the Center to Object button.

6: Only export these objects out at 0,0,0 if you do not have an exporter plugin for Unreal.

7: Enter the editable poly of the zombie again and use Split to separate this object at the elbow.

8: Try using a QuickSlice or Slice Plane to make a jagged edge for your gib/dismemberable piece.

9: Select your first gib and detach it from the rest of the static mesh zombie.

10: Cap the holes of your new gib object with the Cap Holes function on edgeloop mode.

11: Give these caps their own smoothing group.

12: Enter Unwrap UVW modifier and move your new caps into the 0-1 space. DO NOT modify your existing UV islands; we are simply giving your gib caps some UV space for their own material ID texture.

13: Assign an ID of 2 to the caps, so that in Unreal we can apply the gore texture to your gib object caps.

14: Expose your skeleton rig again.

15: Adjust the pivot of your gib object by enabling Affect Pivot Only.

16: Locate the Align tool button.

17: Using the settings in the above image, align the pivot of the gib object to the local space of the bone pivot that it should belong to. My gib piece here is for the Upperarm, so I am aligning it to the Upperarm bone.

18: To give the caps for the gib object quad definition, use Turn to Poly modifier with the above settings: Limit Polygon Size Max 4 and Keep Polygons Convex.
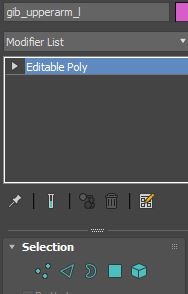
19: Name your gib after the bone it belongs to. When you shoot the zombie Upperarm, my gib object should spawn at the rotation of the Upperarm bone; therefore, I will call my gib object gib_upperarm_l. Bones can have multiple gibs; simple name the gib objects from 0 onwards, like gib_upperarm_0_l.
20: Now that you have made your first gib object, you can quickly do the rest by creating multiple gibs at a time. If you follow the procedure, you can have a fully gibbed character in a couple of hours.
Click the image to show the full import options
Exporting and Importing The Skeletal Mesh
Exporting the non-dismembered skeletal mesh of your character is just case of selecting both the skinned mesh and the bones it’s skinned to and exporting the selected objects.
For our mesh we have used the skeleton of the default UE4 mannequin
If you have a different skeleton (Mixamo for example) it should still work just fine
Import the skeletal mesh, if you are using a skeleton that’s already in your project, select it in the import options like we have.
If the skeleton your character uses is not already in your project, leave the “skeleton” option blank and it will be imported along with your skeletal mesh
Once this has been imported, you should have something like this in your content browser:
Setting up the Physics Asset
Opening up the physics asset that was created when you imported your skeletal mesh, you should see something similar to this.
Important! Although UE4 will generate a physics asset for you, it may not always do it intelligently. It’s required for each bone you want to me dismember-able to have a physics body associated with it
You’ll want to make sure when you simulate your character in the editor they fall down and move realistically and don’t move erratically which can be quite common with the auto-generated physics assets.
I recommend going through this piece of documentation if you’re unfamiliar with the UE4 Physics Asset Editor.
For the zombie in this template, we make use of the Physical Animation Component in UE4. Here’s a very quick step-by-step on what to do with the physics asset to allow for physical animation.
First in the Profiles tab on the bottom right, type in a profile name (We usually choose “Main”) and click New
Now select the bodies of your physics asset that you want to use physical animation and click Assign
When you have these bodies selected they should have a new section in the Details tab called Physical Animation. You may need to deselect and re-select the bodies for this to show up.
In this Physical Animation section, you can input the numbers that define how strong the force is that keeps the simulated bodies conforming to the animation that is playing. As a rule we have the Angular Velocity Strength and Velocity Strength 10% of the Orientation Strength and Position Strength
You will likely want to do some experimentation with these numbers as the result can highly depend on your mesh and physics asset.
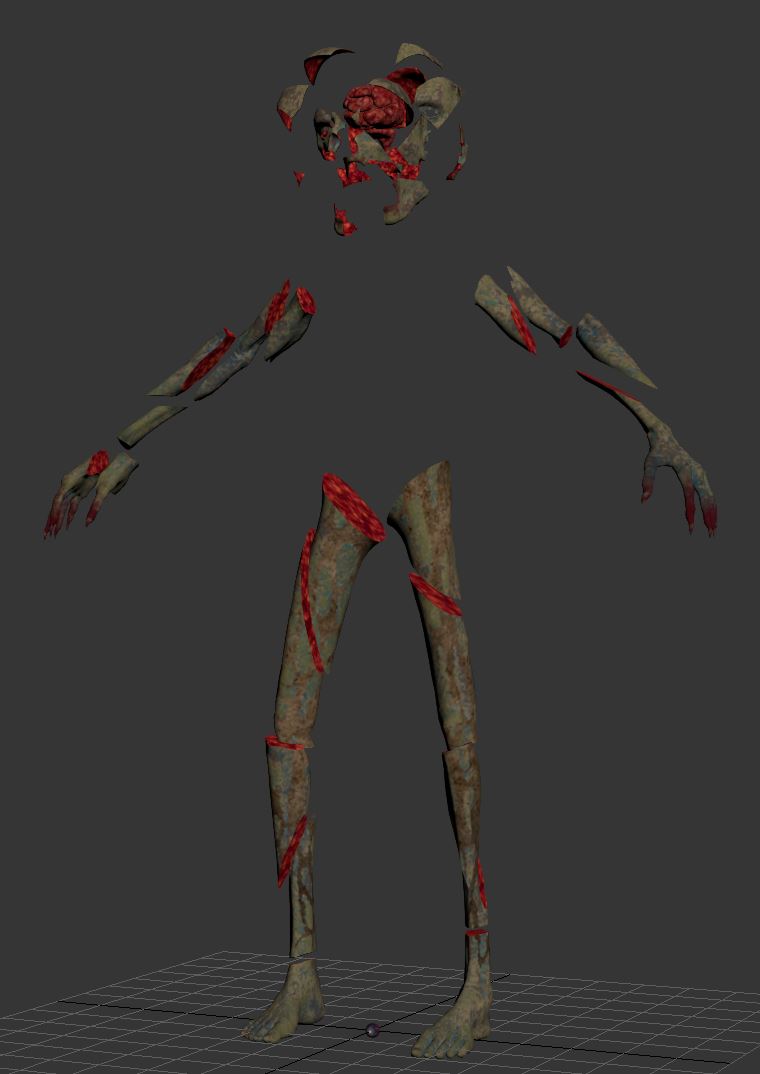
Importing and Setting up Gibs
This is the meat of Dismemberment System, gibs! Back in 3DS Max, we have a set of cut up pieces that we need to now export and import into UE4.
It’s important you follow the requirements set in the first section tutorial on how to cut up these gibs, including the position of their pivot point
To export these, we needs to move each piece separately to 0,0,0 and then export each piece as an FBX file. This can be time consuming so I recommend using TS_Tools UE4 Mass FBX Exporter by Tom Shannon.
If you’re using Maya or Blender or another program there is likely a similar plugin available under a different name.
Once exported, we can import them into UE4. On the import options, you simply need to make sure Auto Generate Collision is ticked as well as Import Materials and Import Textures are unticked.
When you import your gibs, they likely won’t have any materials applied. However it may not be necessary to apply materials to every one in the content browser if you have followed the layout of material IDs set out in the beginning of this tutorial of how to create the gibs in 3DS Max
In order for blood trails to work on your gibs, you need to add a socket to the places that you want trails to come from.
To do this, open up the static mesh of one gib, and in the Socket Manager click the Create Socket button. The name you choose isn’t important as the system will just use all sockets it finds when it spawns this mesh. You can then position the socket to where you want the trail to come from.
The rotation and scale of the sockets can be left as default, since they are not used by the system
I recommend spreading out blood trail sockets across the entire set of gibs for your character, and avoiding giving every single gib a socket. Otherwise the performance hit of the particles will quickly climb
Creating The Character Blueprint
Now we have our skeletal mesh imported and our gibs set up it’s time to create the blueprint that will tie it all together. Start by finding BP_DismemberableCharacter in the content browser, right clicking it and selecting Create Child Blueprint Class and give it whatever name you wish.
This new blueprint we’ve just made uses all the code within the base Dismemberable Character blueprint, we simply need to fill out the variables within to set up dismemberment!
If you already have a character you want to add dismemberment too: Simply make BP_DismemberableCharacter the new parent of your existing character class
Now once we open up this new blueprint we’ve just made, we’ll be greeted with the regular viewport and blueprint editor.
First, set your imported skeletal mesh as the skeletal mesh asset used by the Mesh component within the Components panel on the left
Now, deselect the Mesh component and focus on the right, where you should see the Details panel. This picture here shows the details after being filled out
First we can focus on the Dismember Info within the Config section. The Dismember Info contains all the information the system needs to know which bones to hide and which gibs to spawn depending on where the character takes damage
Clicking the + button will add an entry into the Dismember Info array. Each entry in the array is associated with a bone within the skeleton your skeletal mesh uses. This is defined in the Main Bone variable
The Children Bones variable contains the names of bones that other entries in the array use that are below this entry. So the upperarm_r entry also dismembers the lowerarm_r and hand_r, and does not need the meshes for these two child bones in the GibMeshes variable
The GibMeshes variable links to the static mesh gibs that should spawn when this bone is dismembered. There is no limit to how many meshes can spawn except for performance!
The Damage Threshold variable simply sets how much damage this bone needs to receive before it will dismember
The Initial Rotation and Dismembered variables should not be changed, as they will be set by the system.
In addition to the Dismember Info variable you will see Physics Dismember Threshold and Limb Cull Time.
Physics Dismember Threshold is the speed at which bones or other objects have to be moving to dismember bones that they hit.
Limb Cull Time denotes how many seconds before the character and any spawned gibs are faded out and deleted, to save performance. To disable culling altogether, simply set this number to 0.
Finally you will see under the Materials section of the Details panel Gibs Main Material and Gibs Gore Material.
As mentioned before, make sure your gibs are set up as described in the first section tutorial on how to create them, specifically regarding material IDs
Gibs Main Material should be set to the material corresponding to material ID 0 on your gib meshes, for us this is the same as the material we are applying to our skeletal mesh.
Gibs Gore Material should be set to a gore material that will be applied to the sections of your gibs that have material ID 1. For us this corresponds to the areas that have “broken off” from the main mesh.
Not all gibs require any use of material ID 1, such as the brain parts for the zombie
Now your new dismemberable character should be ready to be destroyed!